Consider a scenario where your warehouse is divided into zones and when the cycle count plans execute you want to create work with work pools specified so that workers can perform cycle counts in specific zones.
This can be done quite easily with a few changes to the standard setup for cycle counting in Dynamics 365 Finance and Operations. The following example would be a sample setup for a two-zone warehouse.
The first item we’ll setup is our work pools. Typically, if you are already using zone picking you will already have work pools setup. In our example I’ve created two work pools one called “Zone 1” and one called “Zone 2”.
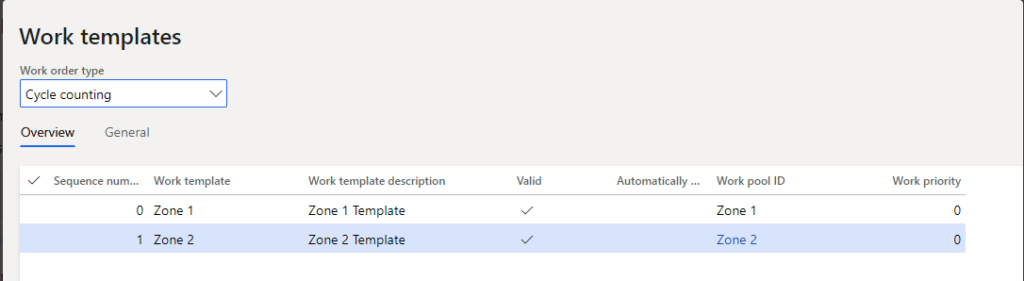
Next, under the work order type of cycle counting we’ll create two work templates. In these templates we need to make sure and specify a zone work pool in each of the templates. In the screenshot below I’ve created two templates. One has a work pool id of Zone 1 and one has a work pool id of Zone 2. There is no need to specify any query here for a specific zone we’ll do that in the cycle count template setup.
Next, I’ve setup two cycle count plans. In one plan I’ve specified the work template called Zone 1 and in the second plan I’ve specified the work template called Zone 2. In the select locations query I’ve set up the plan to only look at zone 1 locations for the zone 1 plan and zone 2 locations for the zone 2 plan. This ensures that when the cycle count plans are processed the zone 1 counts will be created under the zone 1 work template and the zone 2 counts will be created under the zone 2 template.

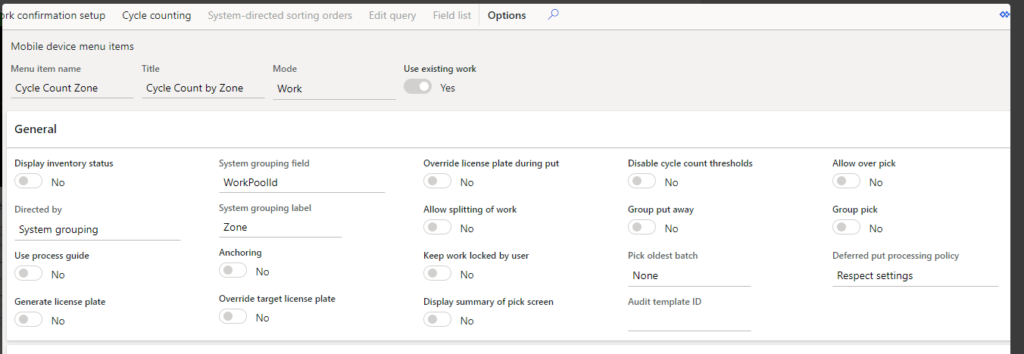
Finally, I’ll setup the mobile menu item to use system grouping. When setting the menu item up it’s important to use Mode work and use existing work since our cycle counting plan will generate work. As I mentioned the directed by will be set as System grouping and the system grouping field will be WorkPoolID to ensure that our system grouping is done by work pool. I’ve also given the grouping field a label of Zone, so my warehouse workers are not confused by the work pool id label.
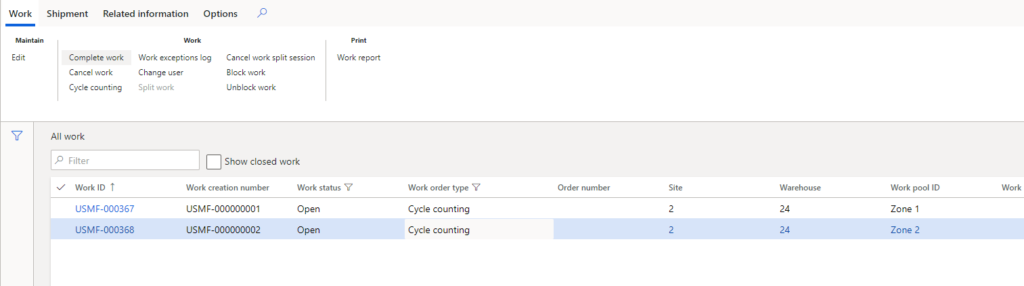
Now that the setup is complete, we can go back and process both of our cycle count plans this in turn generates two cycle count work ids. Notice that both work ids have a work pool id assigned.
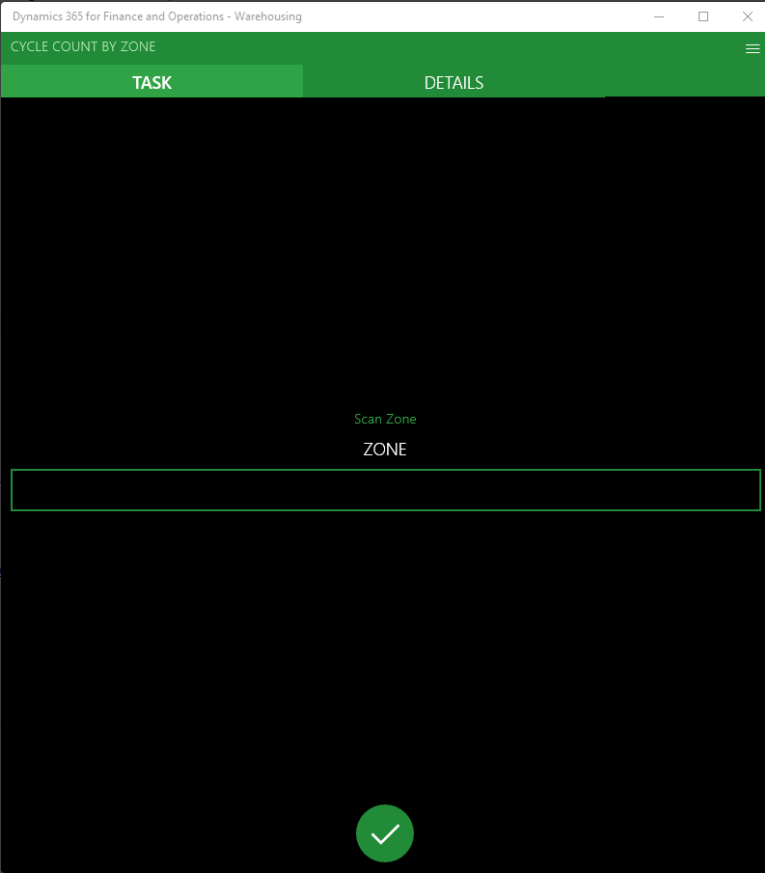
When we login to the Advanced Warehouse Mobile Application and go to the cycle count menu item the first thing we’re asked to scan is the zone. This will determine which work id the user receives. The rest of the process is the normal cycle count process. I have recorded a vlog on that topic and will link it here.