Introduction
Finance and Operations entities in Common Data Service as Virtual entities became generally available in July 2020. The advantage of using virtual entities vs dual write in the common data service for Finance and Operations is that makers can use entities without having to make a copy of the data between Finance and Operations and the Common data service.
In this blog post I will review the setup that is necessary to enable a Finance and Operations virtual entity in the Common data service.
Install the Dynamics Operations Virtual Entity Support
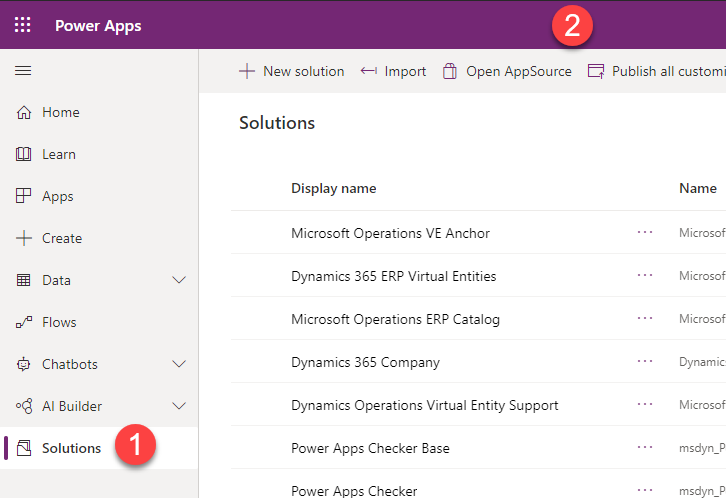
- Go to https://make.powerapps.com, click on Solutions.
- Once in the solutions screen click on Open AppSource.
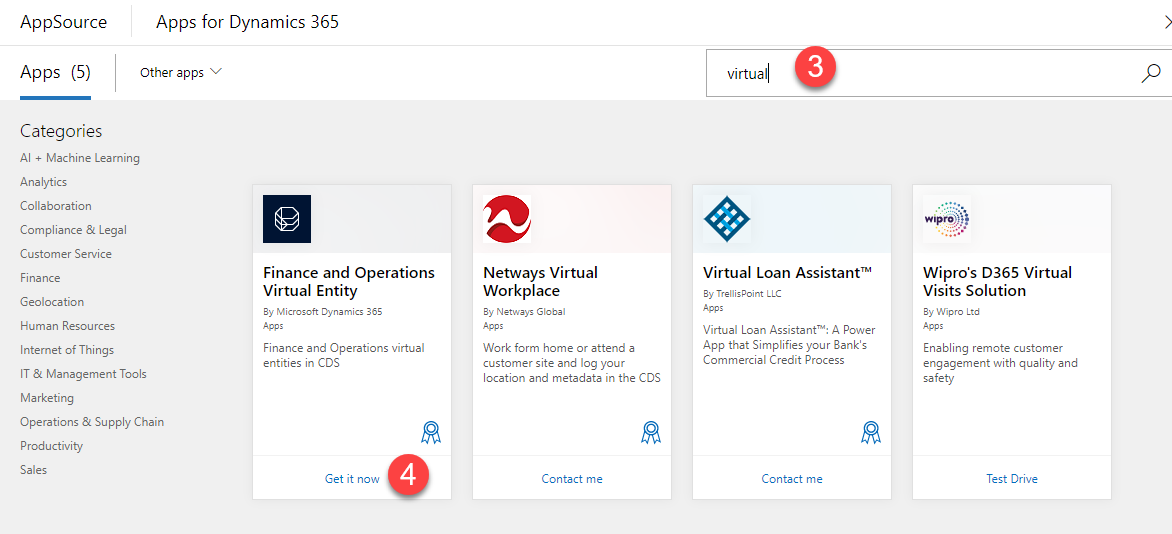
- In the search box type in “Virtual”
- On the Finance and Operations Virtual Entity click “Get it Now”
- Follow the on-screen prompts to install this solution into your environment.
Create an App Registration in the Azure Portal
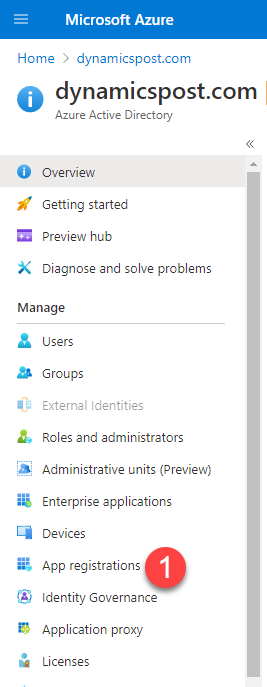
- Go to https://portal.azure.com and click on App Registrations.
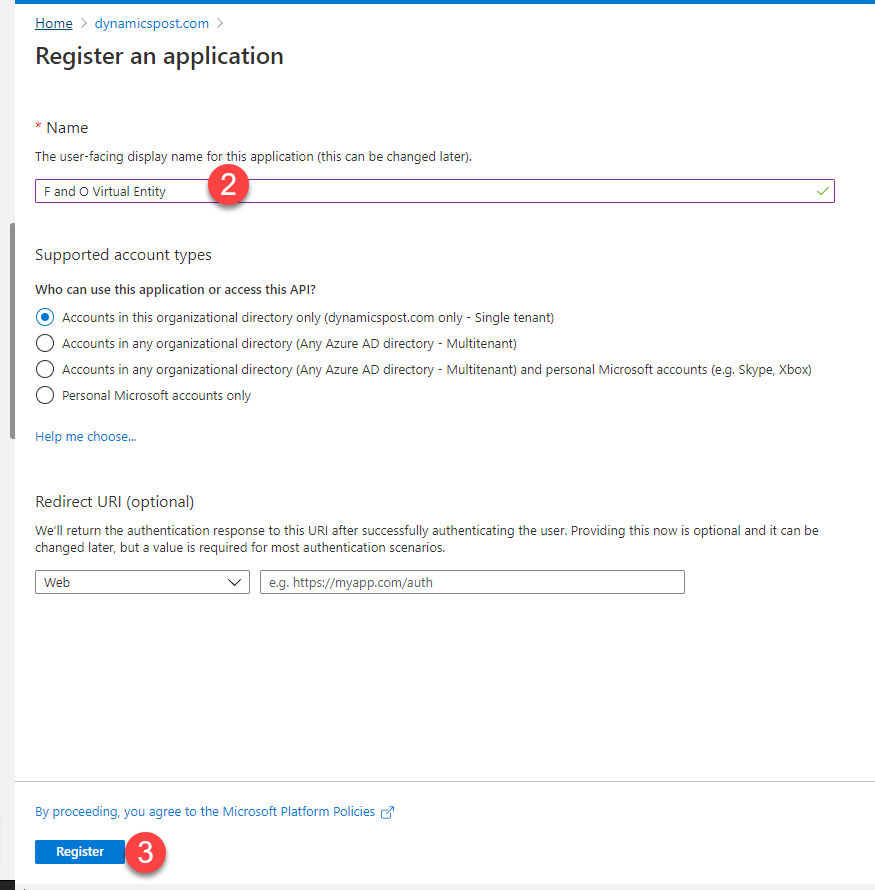
- Click on New Registrations and fill in a name. In my example I’m calling this registration F and O Virtual Entity.
- Click Register. After you click Register you will be on the overview page. Go ahead and copy the application (client) ID and the Directory (Tenant) ID. You’ll need these values later in the setup process.
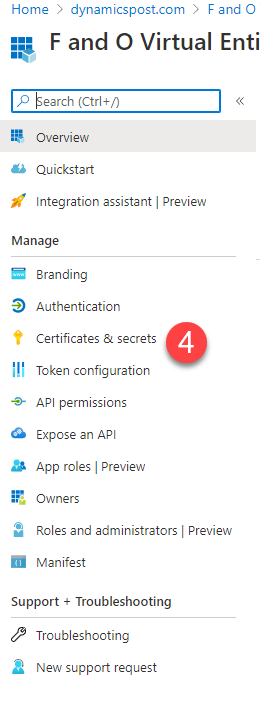
- Click on Certificates and Secrets.
- In the client secret section click new client secret.
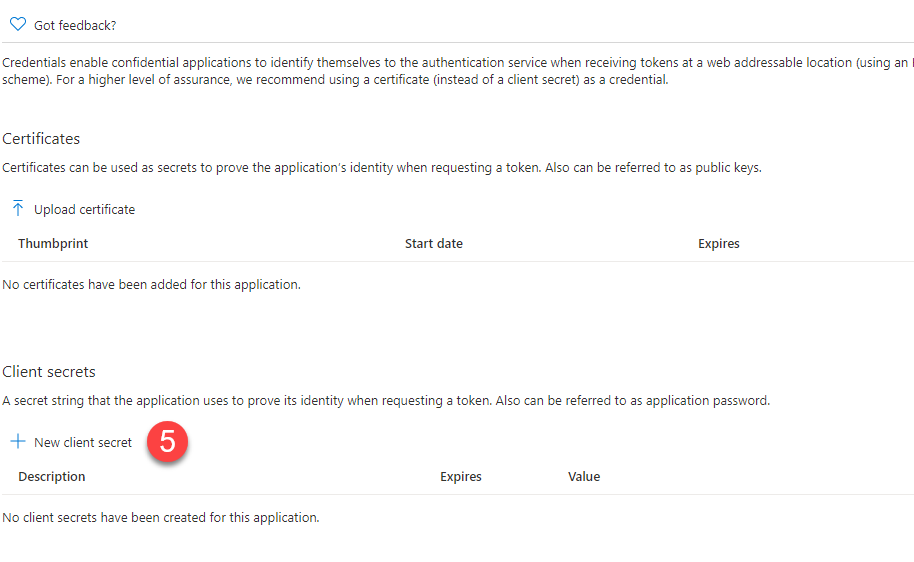
- Give it a name and set it to never expire. In my case I am calling it F and O Virtual Entity. NOTE: at this point copy the client secret value. This value will be hidden after leaving this page.
Create a Virtual Entity user in Dynamics 365 Finance and Operations
- In Dynamics 365 Finance and Operations go to System Admin -> Users -> Users and click New.
- Make up a user ID in my case I am calling the user VirtualEntity.
- Enter a username in my case I am using Virtual Entity.
- Enter an email address in the email field. Note this does not have to be a valid email.
- Under the user’s roles section add the CDS Virtual Entity Application role to the user and remove all other roles.

Add the App Registration to Dynamics 365 Finance and Operations
- Go to System Administration -> Setup -> Azure Active Directory Applications.
- Click New.
- Enter the application (client) id that was copied from a previous step.
- Enter the user that was created above.
- Enter a name, in my example I just enter Virtual Entity.

Configure the Virtual Entity Solution
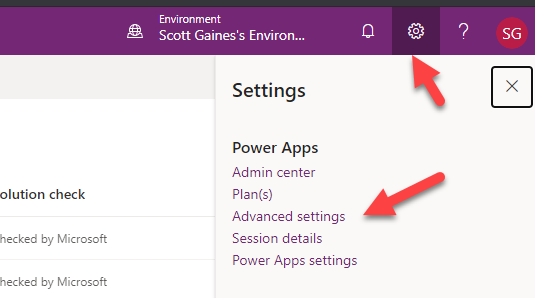
- Go to https://make.powerapps.com, click the gear icon and then click on advanced settings.
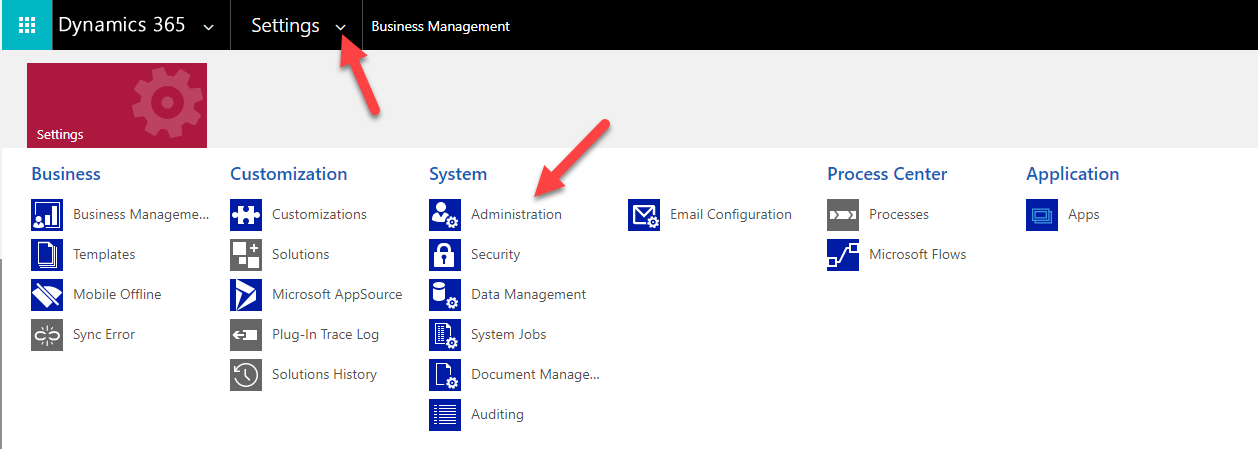
- Click the arrow next to settings and then click on Administration under the System Section.
- Click on Virtual Entity Data Sources.

- In the data sources section click on Finance and Operations.
- Enter the url for your Dynamics 365 Finance and Operations Instance. Include https://
- Enter your Directory (tenant) id. This was copied from an earlier step.
- Enter in the application (client) id. This was copied from an earlier step.
- Enter the client secret. This was copied from an earlier step.
- All the other fields on this form should remain unchanged.
- Click Save
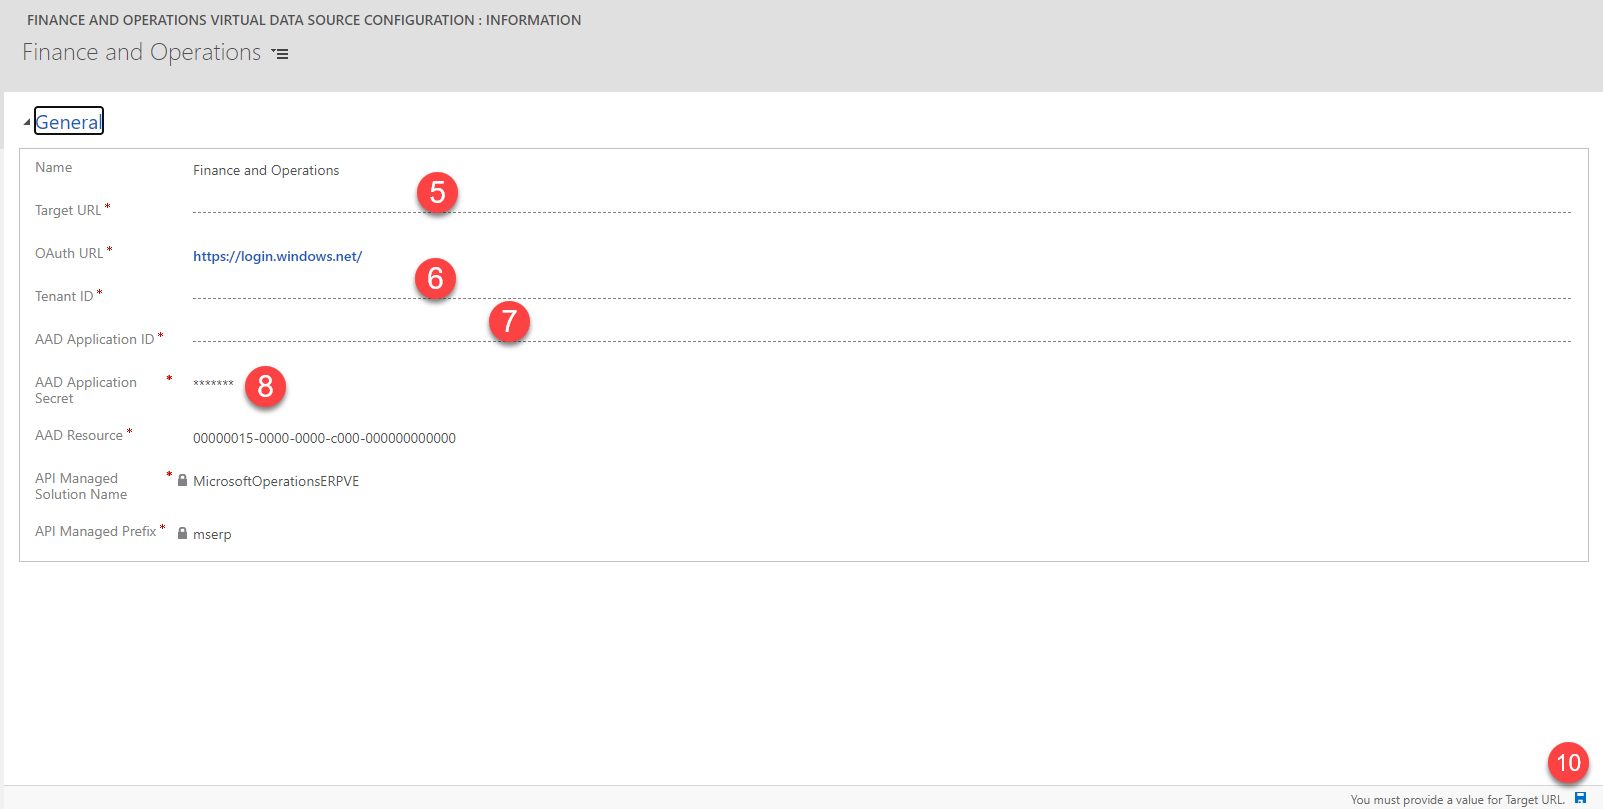
Configure the virtual Entity
The steps below should be completed whenever a new Finance and Operations virtual entity should be added to the common data service. The advanced find will be used to find the entity and enable them.
- Go to https://make.powerapps.com, click the gear icon and click on advanced settings.
- In the upper right-hand side of the page click on the advanced find (funnel) icon.

- In the look for drop down select “Available Finance and Operations Entities. This will list all available entities.
- You can also enter other criteria in this case I’m looking for an entity whose name contains release.
- Click on the results button.

- The entities will display based on your search. The entities that are set to visible Yes are configured for the common data service. To Turn on an entity click on the entity and check the visible checkbox.
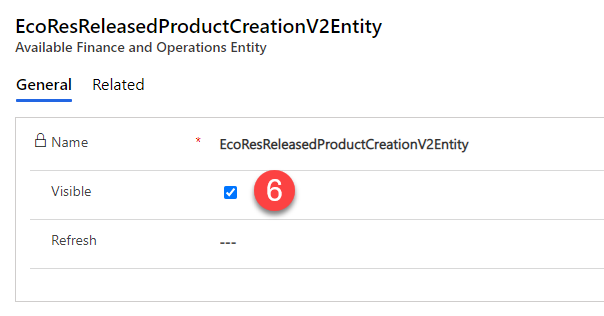
- Save and close the form.
Viewing virtual entities
In order to check to see if the virtual entity is in the common data service go to https://make.powerapps.com, expand the data section and click on entities. To see all entities be sure to change the filter to All. The virtual entities will have (mserp) at the end of the name. You can use the search in the upper right-hand corner of the screen to look for the virtual entities.

Conclusion
The setup for virtual entities has you bouncing around a little bit but is straight forward. Hopefully, you found this blog post helpful.

