There are so many fields that have to be filled out correctly on a released product to ensure that it will work correctly with your company’s business processes. Often, especially for new users, this is a daunting task for the users.
Many users will look to create personalizations to make fields mandatory or request customizations to make fields mandatory or they may have a paper checklist that they follow when setting up an item.
There are various ways to help a user with a process for entering a released product, but today we will take a look at a fairly simple method to implement in Dynamics 365 the template.
What is a template
A released product template in Dynamics 365 allows a user to create either a personal item template or a shared item template from an item. When applied to a new item this template will set the released product fields in the same way that the fields were set on the original item.
A template can be created from an existing item in the released products list or you can create a product specifically to be a template. One other note is that the template creates a copy of the fields so if you create a item that is only to be used to setup a template once the template is created you can delete that item so that you don’t have that item cluttering up your released products list. Remember to delete the product as well as the released product if you are removing the template item.
Creating a template
Creating a template is extremely simple. First you need to decide if you are going to use an existing item or create an item that the fields will be set specifically for the template. If creating a new item just be sure to set all the fields on the released product record exactly how you would want them to be set.
Now that you have your item all you have to do is to go to the Released Product -> Product tab then under the new section click the dropdown next to template.
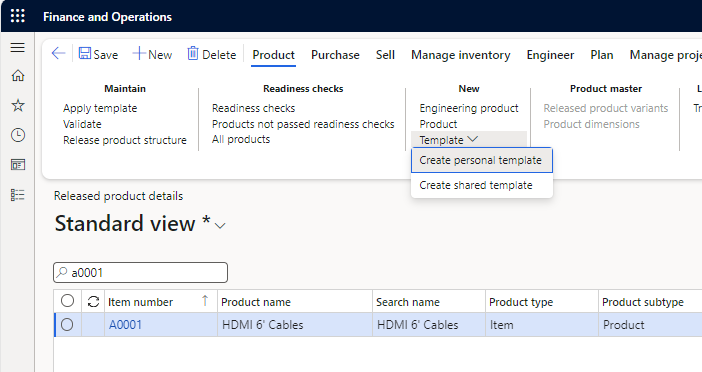
You have the option of creating a personal template that would only be seen by you or a shared template that would be seen by everyone.
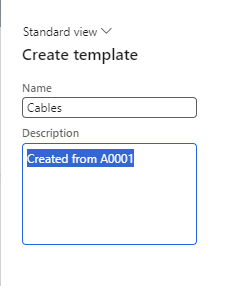
When you click create you are presented with a screen that allows you to name the template and put a description on the template. I generally name my templates as a category or a product type so that it is easily identified by the type of item. I also will in the description put a note as to where I created the template from. i.e. I will generally name the item I created this template from in the description.
Using the template
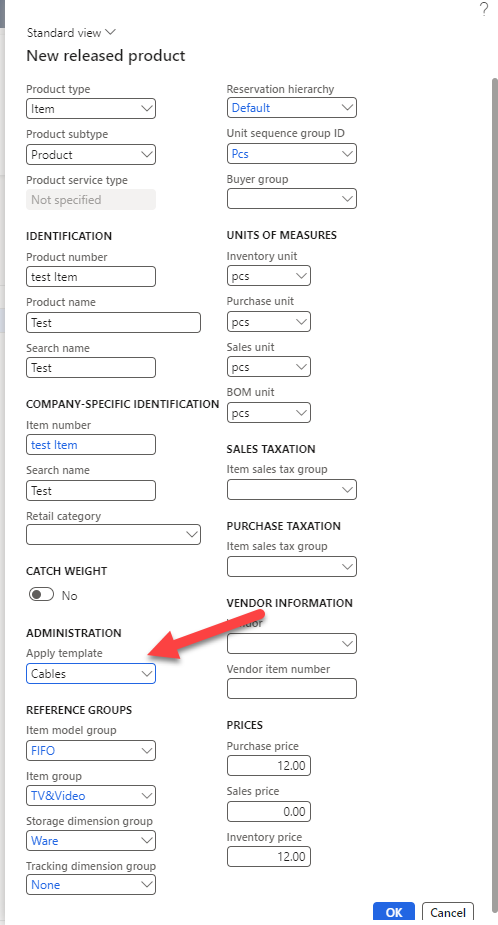
After your templates are created they are pretty straightforward to use. You will just go to the released products form and click new. Then add the item number and descriptions. When you get down to the “Apply template” field simply pick the template that you have created and watch the various fields fill in.
Deleting a template
I mentioned earlier in this post that once a template is created the item it was created from no longer has to exist. That may raise the question of how do I remove a template that is no longer needed.
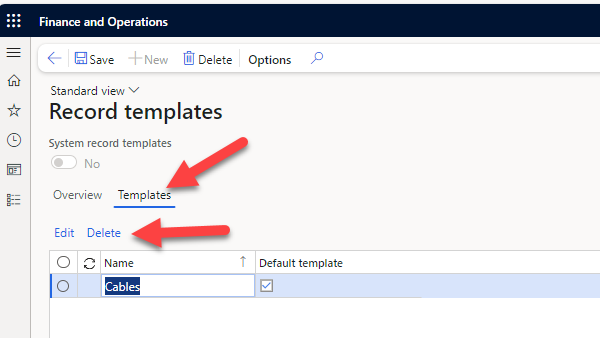
There is a screen called Record templates located under Common -> Setup that will allow you to delete the template. Just click on the template tab and click the delete that is just above the templates. Warning be careful don’t click the delete at the top of the screen or that will delete all of your templates. Ask me later how I know this….
Conclusion
Released product templates are very helpful to ensure proper setup of items. The sheer number of fields that are required for setup can cause issues for the person setting them up trying to remember them all.